
This is the third in a series of posts on the new “Red Deer” (https://github.com/jboss-reddeer/reddeer)
open source testing framework for Eclipse. In the previous posts in
this series, we introduced Red Deer, and examined how to create custom
requirements for test programs. In this post, we’ll introduce Red Deer’s
test Recorder feature.
One
of Red Deer’s goals has always been for it to be an easy to use test
platform, but it’s always lacked the convenience of a keystroke
recording tool. Until now that is. In this post, we’ll take a look at
the new Red Deer Recorder. Before we look at how we can use the
Recorder, let’s take a minute to understand just how it works.
How the Red Deer Recorder Works
Within
the SWT (Standard Widget Toolkit), the org.eclipse.swt.widgets.Display
class provides a filter method to control whether a listener is notified
when an event of a certain type occurs. The Red Deer Recorder sets up
filters for events such as when a UI element is selected, when an item
in a tree is expanded, when a mouse is clicked, etc. When each of these
types of events occurs, it is redirected to the Red Deer Recorder, where
the event is translated into SWTBot or Red Deer source code statements
that you can insert into your test programs.
Let’s take a closer look. The Red Deer Recorder is about rules. To be specific, a hierarchy of Simple and Complex rules.
Based
on the filters defined (by the addFilter(int eventType, Listener
listener) method) on the org.eclipse.swt.widgets.Display class, the
Recorder tries to match each UI event to a Simple rule. Each Simple rule
contains a test to see if the rule applies to a particular type of
event.
When
the Recorder finds a match, that is, when the right type of rule is
found for the event that was received (such as how a ButtonRule applies
to Event whose type is swt.Selection and whose widget is a Button UI
element), the Recorder then examines the widget to determine its
properties. In the case of a Button, these properties include the text
the Button displays, its type (Push/Check/Arrow/Radio/Toggle), and
whether the Button widget is encapsulated inside of another widget such
as a Form. Once the Recorder has determined all the Button’s properties,
then it can generate RedDeer code.
A
more complex scenario involves actions in an event generating more
events, such as a context menu. Complex scenarios require Complex rules.
Let’s look at what happens if you want a test program to select an item
from the context menu of a project as displayed in the Project
Explorer. The sequence of actions here is that you click with the right
mouse button (this generates the first event - mouse down) and then you
will click on menu item from context menu (this generates the second
event - selection). Having your test program record only the second
event isn’t enough, as your test program won’t be able to recognize if
the selected menu item is part of a shell menu or a view menu or a
context menu. We also need the first event, the right click, in order to
be to determine that this menu item was part of the context menu.
In summary, the Recorder process performs three actions:
First, the Recorder only listens for specific types of events (Selection/Expand etc)
Second, the Recorder tries to match events to simple rules
Third,
the Recorder matches multiple simple rules to one complex rule. If a
complex rule is matched then the Recorder generates code according to
that complex rule, if the complex rule is not matched, then code is
generated according to each simple rule. In other words, one Event = a
Simple Rule, while Multiple Simple Rules = a Complex Rule.
Installing the Red Deer Recorder
In
the previous posts in this series, we wanted to be able to extend Red
Deer itself as we wanted to create custom requirements. Accordingly, in
those posts, we downloaded the red Deer source code. This time, we only
have to install the Red Deer Recorder. The steps to do this are:
Navigate to: Help->Install New Software, then create a new software site repository with this URL: http://download.jboss.org/jbosstools/builds/staging/RedDeer_master/all/repo/
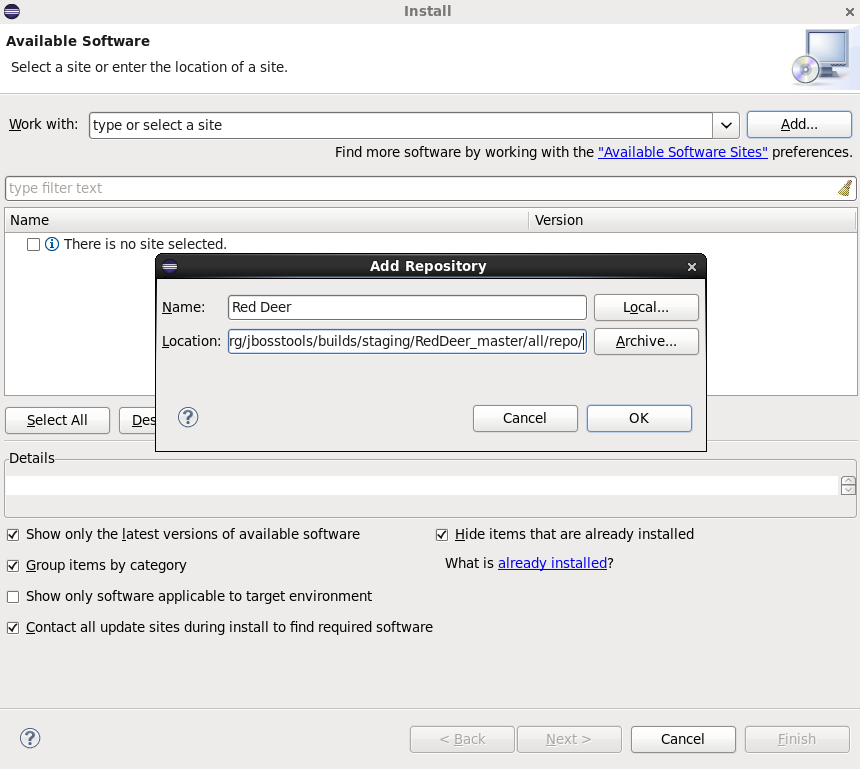
Then, select the Red Deer Recorder from the menu of available software and press the “Next>” button:

And that’s it. The Recorder is installed. Let’s move on and create a new recording.
Running the Recorder
To start the Recorder, navigate to File->New->Other, then select "Run Test Recorder":
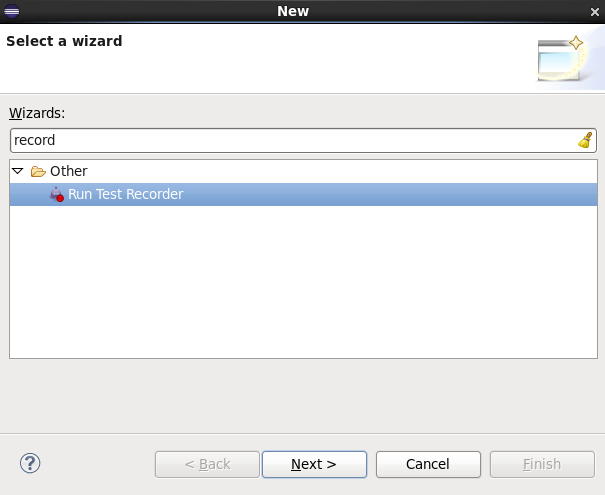
Then press the “Next>” button.
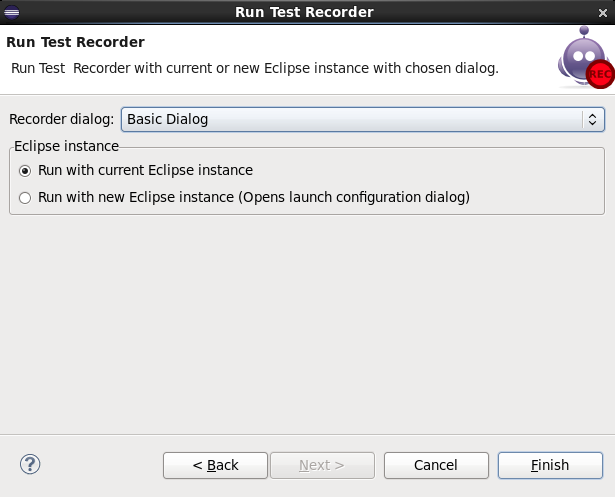
The
Recorder now presents us with some options. We’ll keep things simple
and select the Basic Dialog. In this mode of operation, the Recorder
listens to your keystrokes and mouse actions, parses them through its
simple and complex rules, and generates test code for you.
(The
Recorder’s other mode of operation is the JDT (Java Development Tools)
Dialog. In this mode, you can use the use the Recorder’s UI as an IDE
for test code development. In the current release of Red Deer, the JDT
is still something of a work in progress. We’ll look at the JDT Dialog
in detail in a later post in this series when the dialog’s design is
more mature.)
In
keeping with our goal to keep things simple, we’ll also select “Run
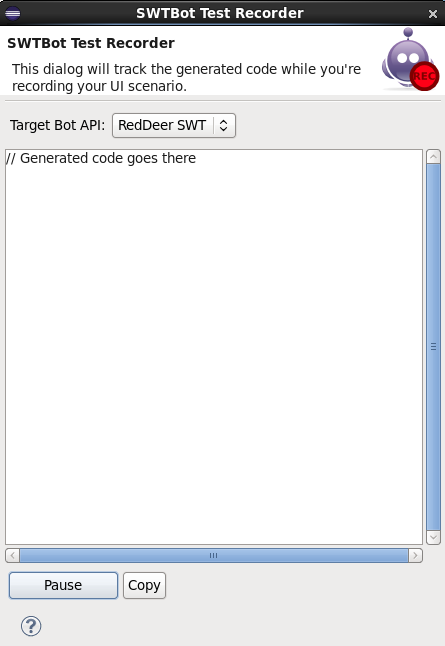
with current Eclipse instance.” When you press the “Finish” button, the
Recorder appears:
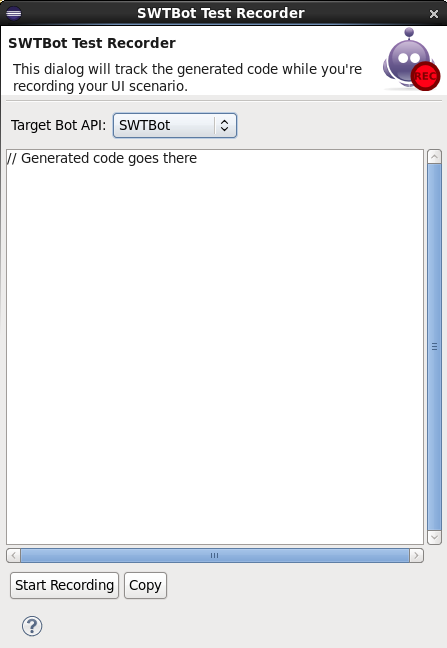
At
this point, we have another choice to make as the Recorder can generate
either SWTBot source code or Red Deer source code. Let’s select Red
Deer and press the “Start Recording” button to get started with a new
recording.
If
we perform a task in the UI, we’ll see all the UI actions and
keystrokes that we perform automatically translated into Red Deer source
code. Let’s create a new Maven project and then examine the code the
Recorder generates.
After
we start the recorder, to create the new Maven project, navigate to:
File->New->Other->Maven->Project and create a simple
project:
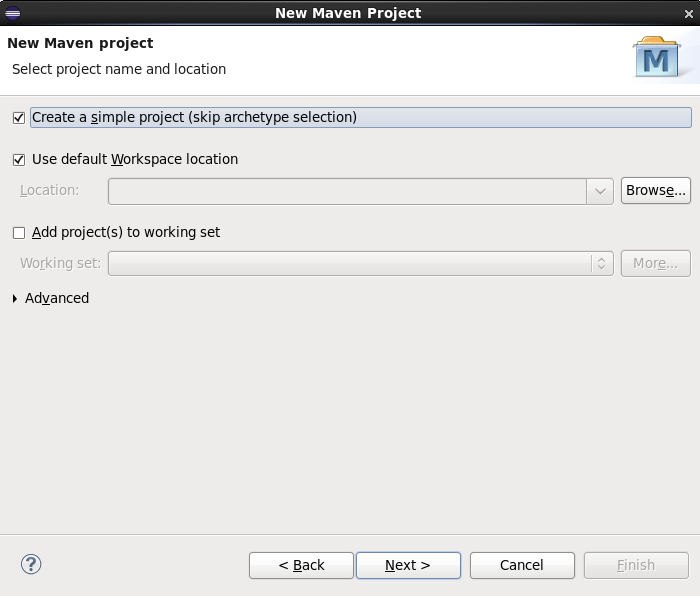
We’ll provide the minimal information on the new project:

And here’s the code that the Recorder generates:

Then, you can easily copy the code into a Red Deer test program.
In Conclusion - A Word About Red Deer and the Recorder
Red
Deer makes creating automated tests easier. With the new Recorder, Red
Deer makes it even easier to create tests and to create new tests. As of
this writing, the Recorder is a work in progress, as is Red Deer
itself. If you are interested in building automated tests for
Eclipse-based products, now is the time to get involved with Red Deer.
Milestone 0.5 was just released (April 2014), and Red Deer will continue
to grow and evolve in the future.
Acknowledgements
The author would like to thank all the contributors to Red Deer (https://github.com/jboss-reddeer/reddeer/blob/master/contributors.txt), especially Rastaslav Wagner and Michael Istria for their work on the Recorder.