Sunday, August 14, 2016

Management tip - When the Pizza is Free, Answer the Phone


It all began with free pizza.

Pepperoni pizza.jpg
Public Domain, https://commons.wikimedia.org/w/index.php?curid=79505


Many jobs ago, when I was working for a company that coincidentally no longer exists, there was a monthly event that no one looked forward to; the monthly managers’ meeting.


My fellow managers were, as individuals, extremely pleasant and competent people, but when they got together, group paralysis seemed to set in as they became collectively incapable, or even afraid, of taking independent action.


I remember one meeting especially well as it taught me a valuable management and leadership lesson. It all involved free pizza. In an effort to improve both morale and attendance, it was decided that the monthly meetings would be scheduled during everyone’s lunch hour, and that a free pizza lunch would be provided.


The meeting started promptly at noon, and soon settled into a familiar pattern of discussing, delaying, denying, and deferring actions to be taken.


And then, the telephone in the conference room rang.


The conversation stopped. Everyone stared at the telephone as it continued to ring. What could this mean? Why would someone place a telephone call into a conference room? Were we being watched? The phone continued to ring. Everyone stared at the phone, trying to will the ringing to stop.


After a few rings, I answered the phone. “It’s the front desk. The pizza is here.” Instantly, the tension was broken. Everyone started to breathe again.


But, after a few seconds, everyone froze again. Glances of uncertainty were exchanged. Everyone in the room shared the same thought, “What should we do now?” After a few more seconds of deafening silence, I stood up and addressed the team, as they sat frozen in their chairs and said, “I’ll go downstairs and get the pizza.”


OK, I may be exaggerating for dramatic effect, but I really did see this happen. It’s easy to dismiss this silly little story as a silly little story, but I think that there’s more to it. Individuals, small groups, and large institutions often create their own inertia. It’s the responsibility of team leaders and managers to recognize when forward progress is stalled and change the team’s inertia by removing obstacles. This may require shifting resources from one task to another, or it may require adjusting the relative priorities of task assignments, or it may require simply answering the phone and picking up free pizzas.

Friday, May 6, 2016

The JBoss apiman Crash Course Guide is published!

Just published a brief and easy to follow "crash course" guide to JBoss apiman. Hoping that this will help lots more people get started with API Management with JBoss apiman...

http://www.apiman.io/latest/crash-course.html

Friday, April 8, 2016

Introduction to User Roles in apiman


In this post, we’ll examine apiman user roles. In the apiman data model, all data elements exist in the context of the organization. The same holds true for user memberships as users can be members of multiple organizations. Permissions in apiman are role based. The actions that a user is able to perform are dependent on the roles to which the user is assigned when a user is added as a member of an organization.

Let’s start by looking at the roles that are preconfigured in apiman.

Understanding OOTB apiman user roles

In apiman, each role defines a set of permissions granted by that role. When a user is made a member of an organization, that user must be assigned to a role. A role definition consists of a name and description, and, most importantly, a set of permissions that govern the user’s ability to view, edit, and administer the organization itself, as well as the organization’s plans, APIs, and applications.

Roles are managed in the Roles section of the apiman System Administration form in the Management UI.

Apiman is preconfigured with the following roles:

  • Organization Owner
  • API Developer
  • Client App Developer

These role names are self-explanatory. For example, a user assigned the Application Developer role is able to manage the organization’s applications but is blocked from managing its APIs or plans.

The full set of permissions provided in apiman by these preconfigured roles are:

Preconfigured apiman Role
Who Should be Assigned this Role
Permissions Granted to this Role
Client App Developer
Users responsible for creating and managing client apps.
  • Client App View
  • Client App Edit
  • Client App Admin
Organization Owner
Automatically granted to the user who creates an Organization.
All permissions:
  • Client App View
  • Client App Edit
  • Client App Admin
  • Plan View
  • Plan Edit
  • Plan Admin
  • API View
  • API Edit
  • API Admin
  • Organization View
  • Organization Edit
  • Organization Admin
API Developer
Users responsible for creating and managing APIs.
  • Plan View
  • Plan Edit
  • Plan Admin
  • API View
  • API Edit
  • API Admin

Organization owners can assign roles to users through the “Manage Members” form in the apiman Management UI. Each user must be assigned at least one role, but users can also be assigned multiple roles.

We’ll walk through an example of assigning a role to a user in a moment.

While apiman admin users can also modify the permissions as defined for these preconfigured roles, it can be easier to create new custom roles. We will also walk through an example of creating a new user role later in this post.

Assigning/Revoking Roles for Organization Users

It’s worth repeating that all data elements in apiman exist in the context of an organization.  As a result, it is important to understand that users can only manage these elements if they have the appropriate role for the organization in which the elements exist.  Therefore, a user must be granted membership in an organization.

It’s not possible for users to assign themselves roles. Roles must be assigned to a user by an organization owner. Assigning a role to a user is a straightforward task for an organization owner.

First, the organization must search for the user:

6.png

And then, the organization owner can select a role from the existing set of roles:
5.png

Revoking a role for a user is just as easy. The organization owner simply has to search for the user, and then deselect a role for the user.

The same approach for assigning/revoking a role for a user is followed for the standard roles that are preconfigured in apiman, and for custom roles that you create.

Creating a New User Role/Defining the Role Permissions

In addition to providing a set of preconfigured roles, apiman also provides a means for apiman admin users to create new roles where you can define a custom set of permissions for each role. Custom roles give you the ability to exercise fine-grained control over the set of permissions granted to users.

Let’s look at an example of a custom role.

Imagine a situation where you have API developer users and application developer users. These sets of users can rely on apiman’s preconfigured roles. Let’s also imagine that you have a third set of user. You want these users to have read access to APIs and applications so that they can participate in a review/approval process. However, you do not want to give these users write access. For example, suppose you have to find a job for a certain relative of yours. He may be a thoroughly competent person, but you’d feel better if he didn’t have write access to anything valuable. A read-only role for your brother in law would look something like this:

3.png


Once the “brother-in-law” role is created, you can assign it to other users in the same manner as any other role:


4.png


In Conclusion

A consistent pattern in apiman is a rich set of features provided OOTB, and a method for you to expand on these features by creating customizations. User roles enable you to assign users permissions based on the tasks that they perform. Apiman is preconfigured with a rich set of roles OOTB, and also enables you to create new, custom roles to handle additional types of users (even your brother-in-law).


Tuesday, February 23, 2016

Improvements to Plugin Management in JBoss apiman

Introduction - Policies - The Most Important Part of API Management

In API Management, policies are where the action is. It’s through the application of policies that an API Management system such as apiman performs API governance. All the subsystems in apiman, from the Management API UI to the API Gateway, exist for one ultimate goal; to ensure that API governance is achieved by the application of policies to API requests. In apiman, a policy is a rule, or set of rules that controls responses to API requests. There are multiple types of apiman policies. Some policies allow or block access to APIs based on the IP address of the client application, while others allow or restrict access to specific resources provided by an API, while still others enable you to control or “throttle” the rate at which requests made to an API.  

Apiman is preconfigured with a set of policies, and also enables you to create your own custom policies. This article describes the improvements introduced in apiman release 1.2.x that enable you to better manage your custom policy plugins.

Apiman Plugin Management Improvements - Extending Flexibility

Apiman is not only preconfigured with a rich set of policies that you can use, right out of the box, but, from its earliest releases, apiman has also included a mechanism that you can use to define your own custom policies through plugins.

Apiman release 1.2.x adds these new features that enable you to better manage your custom policy plugins:

  • Uninstalling Policies
  • Upgrading Policies
  • Automatically Reloading SNAPSHOT Version Policies

The best way to understand how these features work is to see them in action.

Uninstalling a Policy Plugin

Before we can uninstall a policy plugin, we have to install it.

Apiman is preconfigured with a core set of policy types that can handle many common situations:

  • Authorization - Access to API resources is controlled by user roles
  • BASIC Authentication - A username/password is required to access an API
  • Caching - Cache responses from a backend API
  • Ignored Resources - Paths to API resources that will not be accessible
  • IP Blacklist - Clients with specific IP address(es) will be blocked from accessing an API
  • IP Whitelist - Clients with specific IP address(es) will not be blocked from accessing an API (all IP addresses not listed will be blocked)
  • Limiting - Access to an API is limited by the number of requests in a defined time period (generally used to create a fine-grained limit)
  • Quota - Access to an API is limited by the number of requests in a defined time period (generally used to create a coarse-grained limit)
  • Transfer Quota - Similar to a Quota policy, but based on the number of bytes transferred, not the number of requests

These core policy types cannot be uninstalled.

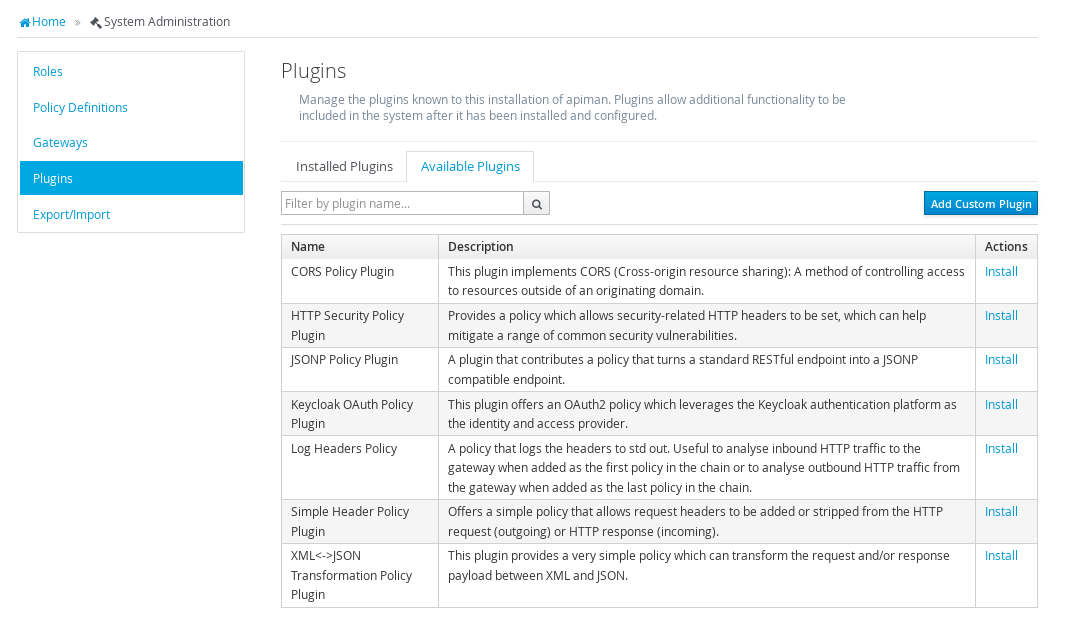
Apiman is also includes second set of policy types which can be optionally installed as plugins:

  • CORS - This plugin implements CORS (Cross-origin resource sharing): A method of controlling access to resources outside of an originating domain.   
  • HTTP Security - Provides a policy which allows security-related HTTP headers to be set, which can help mitigate a range of common security vulnerabilities.     
  • JSONP - A plugin that contributes a policy that turns a standard RESTful endpoint into a JSONP compatible endpoint.     
  • Keycloak OAuth - This plugin offers an OAuth2 policy which leverages the Keycloak authentication platform as the identity and access provider.     
  • Log Headers - Offers a simple policy that allows request headers to be added or stripped from the HTTP request (outgoing) or HTTP response (incoming).     
  • XML<->JSON Transformation - This plugin provides a very simple policy which can transform the request and/or response payload between XML and JSON.    

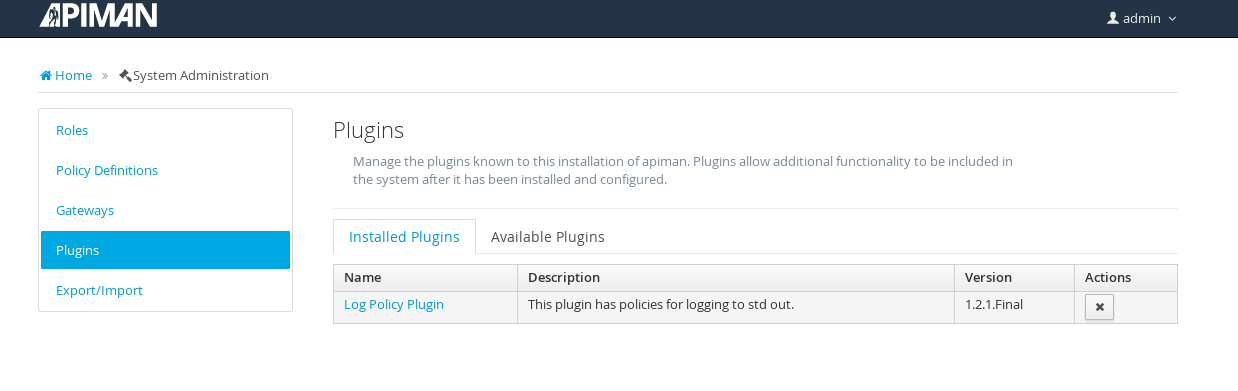
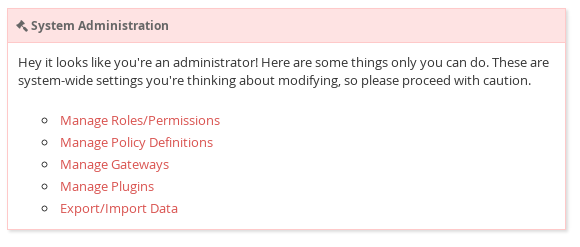
The optional plugins are accessed in this administrative page in the apiman Management UI:
Policies_1.png
To install a policy plugin, click on “Install” - for example, to install the Log Headers Policy:
Plugin_2.png
And, it’s installed!
Plugin_3.png

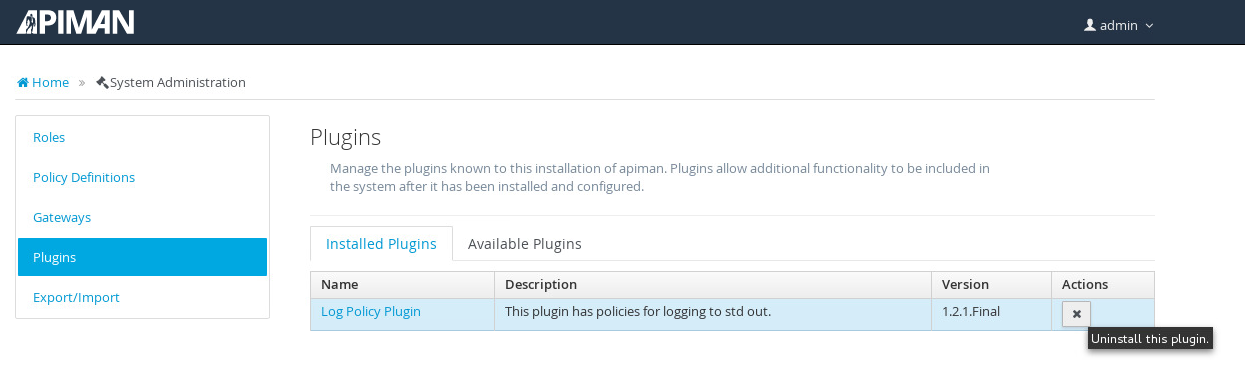
OK, we installed the policy plugin. Now, let’s uninstall it!

Uninstalling a policy plugin is as simple as installing it. All you do is select the plugin from the “Manage Plugins” page in the Administrative UI:

Plugin_4.png
There are a couple of caveats to keep in mind when you uninstall a policy plugin:

  • First, uninstalling the plugin removes it from the apiman Management UI, but it still remains in use for all APIs in which it was previously configured.
  • Second, if you want to completely remove the plugin from all APIs in which it was previously configured, you must manually click on each API, Plan, and Client App that uses the policy and remove it. Apiman does not include a single “kill” button to automatically remove all references to a policy.

Upgrading Policy Plugins

In addition to enabling you to create and install your own custom policies, apiman also provides a mechanism to upgrade to new versions of those policies. This is an especially useful feature as, over time, a policy may be upgraded to include bug fixes or new features.

The best way to illustrate how to upgrade a policy plugin is to follow the process step-by-step.

For this illustration, we’ll use one of the policy plugins provided in the official apiman plugins git repository (https://github.com/apiman/apiman-plugins) as our custom plugin. Many of the plugins provided in this repository are also available set of “available plugins” packaged with apiman. We’ll use one of the plugins (“test-policy” - it’s a very simple policy that adds a header to the inbound http request) that is not already installed into apiman for this example.

(Note that in order to follow this example, you will have to have maven and git installed.)

To download the policy plugins, execute these commands:

cd apiman-plugins

Before we build the plugins, we have to make one small change. The plugins as downloaded are assigned version numbers that include a -“SNAPSHOT” suffix. We will want to remove that suffix for this example. (Sneak peek: We will restore the suffix later in this article as apiman includes a new feature where “SNAPSHOT” version plugins are automatically reloaded.)

To make these changes, edit these files, and change the version from “1.2.2-SNAPSHOT” to “1.2.2”:

./pom.xml
test-policy/pom.xml

Then, to build the plugins, and install them into your local maven repo (at runtime, the apiman API Gateway installs plugins from the local maven “.m2” repo directory), execute this command:

mvn install

OK, our policy plugin is built, let’s add it into the management UI.

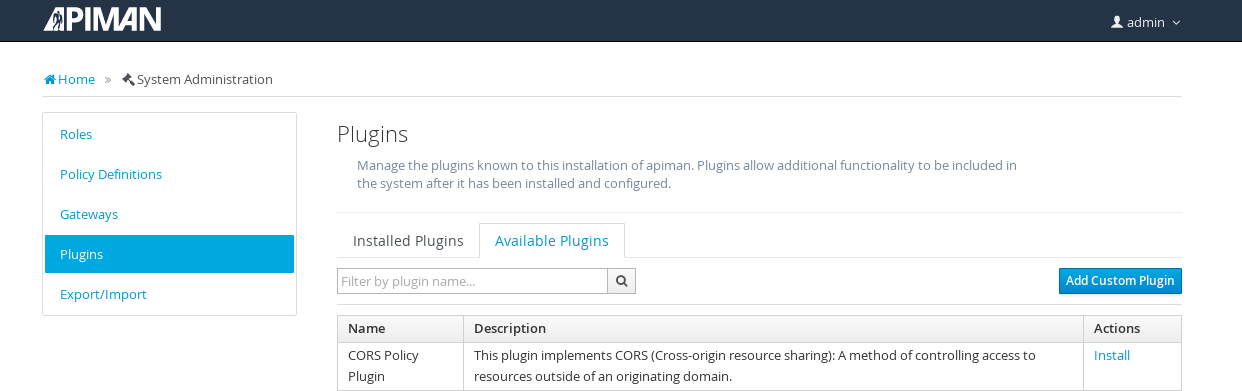
As an administrative user, navigate to the “Manage Plugins” page in the Management UI and select the “Available Plugins” tab:

Plugin_10.png
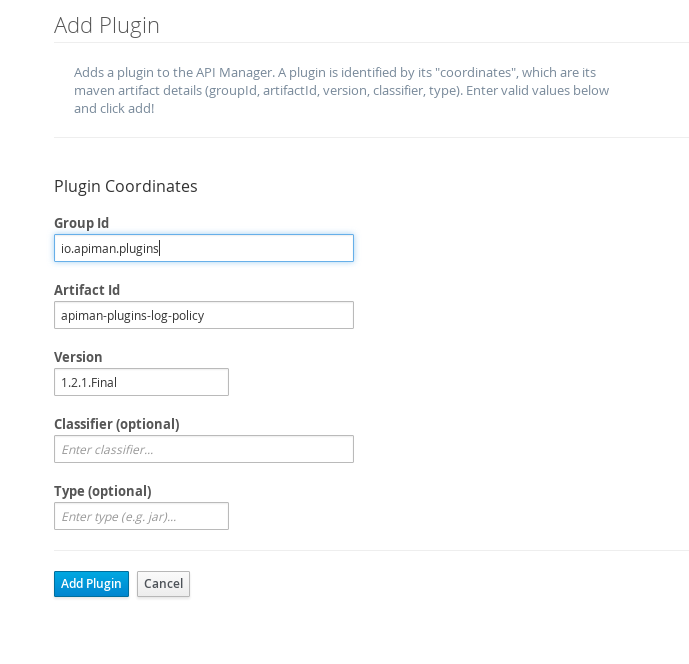
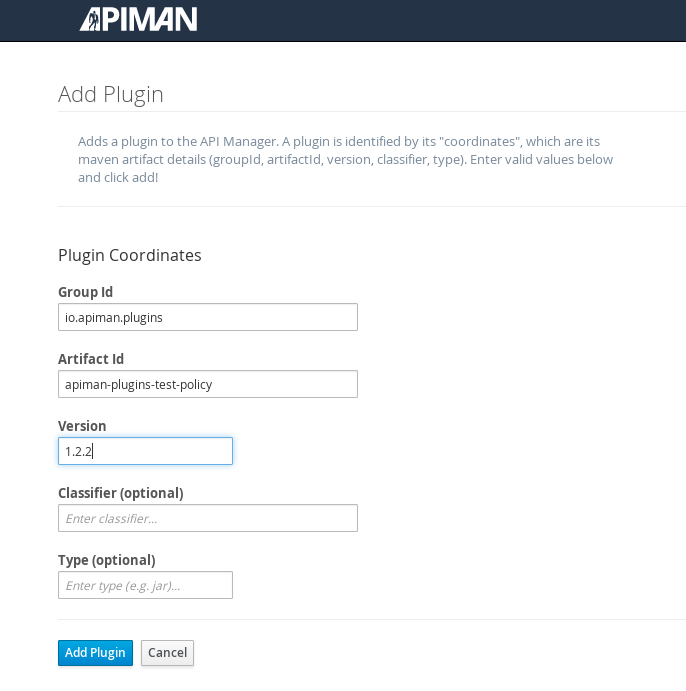
Then, click on the “Add Custom Plugin” button. The following dialog is displayed. Fill in the details for the “test-policy” plugin. (You can find all this information in the plugin’s “pom.xml” file.) apiman will use this information to locate the policy plugin in your local maven repo:

Plugin_9.png
And, after you click on the “Add Plugin” button, the policy plugin is installed:

Plugin_6.png

Notice that there are (2) buttons in the “Actions” column of the “Installed Plugins”  table. The button labeled with an “X” enables you to remove the plugin. The button labeled with an up-arrow enables you to upgrade the policy plugin.

In order for apiman to recognize that a plugin policy has been updated, the plugin version number must change. To change the version number of the test-policy plugin, edit these files, and change the version from “1.2.2” to “1.2.3”:

./pom.xml
test-policy/pom.xml

Then, to rebuild the plugins, and install them into your local maven repo, execute this command:

mvn clean install

After rebuilding the plugins, return to the apiman Management UI, and click on the plugin policy’s upgrade button. Enter the new plugin version number in the dialog that is displayed:

Plugin_7.png

And, after you perform the upgrade by clicking on the “OK” button, the plugin is upgraded:

Plugin_8.png

There are a few important things to keep in mind while upgrading policy plugins:

  • The upgraded version of a policy plugin replaces the previous version.
  • Plans, APIs, or Client Apps that had previously been configured with the old version of the plugin policy will continue to use that older version. They will not be automatically updated to use the upgraded version of the policy plugin.
  • New Plans, APIs, or Client Apps that are created after the policy plugin was upgraded will use the new/upgraded version.
  • If you want to upgrade existing Plans, APIs, or Client Apps to use an upgraded policy plugin, then you will have to manually remove the old policy plugin version and then add the new policy plugin version. The apiman project documentation recommends against doing this unless there is a bug fix or new feature added in a policy plugin upgrade.

Automatically Reloading SNAPSHOT Version Policies

The final new feature added to Plugin Management in apiman 1.2.x is the automatic reloading of SNAPSHOT version policy plugins.

When you are developing a custom policy plugin, you may have to uninstall and reinstall the plugin many times while it is being debugged. This can quickly become a time-consuming manual task. Apiman 1.2.x now makes it possible for you avoid this manual installing/re-installing.

As we’ve just seen, the apiman API Gateway installs policy plugins from your local maven repo. To be more efficient, the API Gateway caches plugins the first time that they are used. If, however, a plugin’s version ends with a “-SNAPSHOT” suffix, then the API Gateway will reload it every time the plugin is used.

So, by including a “-SNAPSHOT” suffix in your custom policy plugin’s version, you can iterate through changes to the policy plugin  without having to manually uninstall and then install each new version of the plugin.

Let’s take a look at this in action.

Since we want to take advantage of the automatic reloading, we must restore the “-SNAPSHOT” suffix to the test-policy custom policy plugin. To make these changes, edit these files, and change the version from “1.2.3” to “1.2.2-SNAPSHOT”:

./pom.xml
test-policy/pom.xml

Then, to build the plugins, and install them into your local maven repo, execute this command:

mvn clean install

And then add the custom policy plugin in the Management UI:

Plugin_11.png
And, here’s the installed plugin:

Plugin-12.png

Before we can configure the custom policy plugin, we need an API. For this example, we’ll use our old friend, “apiman-echo.” You can download this API from this git repository: https://github.com/apiman/apiman-quickstarts.git

The steps to build, deploy, and configure this API are available in the first article in this series: http://www.apiman.io/blog/introduction/overview/2015/01/09/impatient-new-user-redux.html

We’ll use the postman web client to access the API. The first time that we access the API, we’ll see this response (note the text highlighted in green):

{
"method" : "GET",
"resource" : "/apiman-echo",
"uri" : "/apiman-echo",
"headers" : {
  "Accept" : "*/*",
  "Cache-Control" : "no-cache",
  "User-Agent" : "Mozilla/5.0 (X11; Linux x86_64) AppleWebKit/537.36 (KHTML, like Gecko) Chrome/46.0.2490.86 Safari/537.36",
  "Connection" : "keep-alive",
  "Test-Policy" : "true",
  "Postman-Token" : "8808bb68-1c1c-ef97-449d-ab60f620b0e5",
  "Host" : "localhost:8080",
  "Accept-Language" : "en-US,en;q=0.8",
  "Accept-Encoding" : "gzip, deflate, sdch"
},
"bodyLength" : null,
"bodySha1" : null
}

OK, now, let’s change the policy plugin. In this file: src/main/java/io/apiman/plugins/test_policy/TestPolicy.java

Change this line from this:
request.getHeaders().put("Test-Policy", "true");

To this:
request.getHeaders().put("Test-Policy", "quite true");

And then, rebuild the plugin with this command:

mvn clean install -DskipTests

(The “skipTests” directive is a bit of laziness. There is a test included in the plugin that will fail because of the change that we just made. You can either run this command as it is, or you can edit the test in the plugin to also look for a string of “quite true.”)

Now, when we access the API again, we’ll see the change reflected - without our having to manually upgrade or uninstall/install the policy plugin:

{
"method" : "GET",
"resource" : "/apiman-echo",
"uri" : "/apiman-echo",
"headers" : {
  "Accept" : "*/*",
  "Cache-Control" : "no-cache",
  "User-Agent" : "Mozilla/5.0 (X11; Linux x86_64) AppleWebKit/537.36 (KHTML, like Gecko) Chrome/46.0.2490.86 Safari/537.36",
  "Connection" : "keep-alive",
  "Test-Policy" : "quite true",
  "Postman-Token" : "bb900e07-249c-66e4-980a-2c9a70002c45",
  "Host" : "localhost:8080",
  "Accept-Language" : "en-US,en;q=0.8",
  "Accept-Encoding" : "gzip, deflate, sdch"
},
"bodyLength" : null,
"bodySha1" : null
}

In Conclusion

From its first releases, apiman has provided users with flexibility, including support for adding custom policies through plugins. In the latest release, apiman has expanded on that flexibility by enabling users to uninstall policy plugins, upgrade policy plugins, and automatically reload policy plugins.

References


Cross-posted here:  

Wednesday, January 27, 2016

apiman 1.2.1 Export and Import

The Question you Dread

If you use a computer at home or at work, you'll eventually find yourself in a situation where you lose some important data and, while you are trying to recover it, someone asks you a question that is simultaneously annoying and terrifying:

"Did you make a backup?"

Happily, the 1.2 release of apiman includes a new feature that enables you to export and import your apiman data and provides you with an easy means to create apiman data backups.  In this post,  we'll take a look at the new export/import feature, and how you can use it for a variety of tasks to protect your data, make your life easier, and enable you to avoid annoying and terrifying questions.

For test data, we'll use the same types of data (organizations, users, plans, policies, APIs and client apps), that we created in the initial post in this series. (  https://dzone.com/articles/impatient-new-users )

Note that since that post was written in January 2015, some of the names of the data elements have changed. You can either create the test data referred to in this post yourself, or you can import the data file attached to the post.

Export/Import in apiman 1.2.1

The new export/import feature in apiman 1.2.1 enables you to export your apiman configuration data to a file, which can later be imported into an apiman system. Note that this feature follows an all-or-nothing approach in that is does not support incremental backup and restore of selected apiman data.
The three main use cases that the export/import feature supports are:
  • Backing up all your apiman data
  • Upgrading to a newer version of apiman
  • Migrating apiman data from a Test environment to a Production environment
The export/import operations are only available to Administrative users. The export/import feature is accessed through the admin operations menu:

Image title

Once you select the Export/Import Data feature, this menu is displayed:

Image title

One thing to keep in mind is that while you are importing or exporting data, no changes to data should be made or else the export/import may encounter an error, or may result in incomplete results. To be safe, you should disable user access to the API Manager, both the Management UI and its REST interface, for the duration of the import or export operation.

We'll look at exporting data first.

Backing up apiman Data

To make a backup of all your apiman data, simply select the "Export All" button. The apiman data will be written to a file and downloaded by your browser. Your browser's settings will determine where the file is saved.

The apiman data is written to a file named: api-manager-export.json

As its name indicates, the apiman data is written in JSON form. This format provides us with  several advantages. First of all, it's the format in which apiman is able to import data. (We'll perform an import later in this post.) Secondly, it's a text file where the contents of the file are human readable. The content of the file is ALL the apiman data, both the data elements that you have created and the data elements with which apiman is preconfigured.
Reading this file can greatly increase your understanding of the elements that are defined in apiman. Let's take a look at the elements in the file:
  • Users - The preconfigured "admin" user is defined here, as are the new users we create.
  • Gateways - The preconfigured apiman Gateway is defined here.
  • Roles - The preconfigured, permission-based roles, and new roles that we create, are defined here. For example, the "OrganizationOwner" role is shown to have these permissions: [ "apiAdmin", "orgAdmin", "apiView", "orgEdit", "clientEdit", "clientAdmin", "planView", "orgView", "planAdmin", "clientView", "planEdit", "apiEdit" ]
  • Policy Definitions -  Next, the preconfigured policies, and new policies that we create, are defined here. For example: the "RateLimitingPolicy" is described as "Enforces rate configurable request rate limits on an API.  This ensures that consumers can't overload an API with too many requests."
  • The remainder of the file includes the elements that we create: Organizations, Plans, APIs, and Client Apps. For example, here is the definition of the "echo" API that we created:
 "Apis" : [ {  
  "ApiBean" : {  
  "id" : "echo",  
  "name" : "echo",  
  "description" : "The echo API",  
  "createdBy" : "serprov",  
  "createdOn" : 1453773184836,  
  "numPublished" : 1  
  },  
  "Versions" : [ {  
  "ApiVersionBean" : {  
   "id" : 10,  
   "status" : "Published",  
   "endpoint" : "http://localhost:8080/apiman-echo",  
   "endpointType" : "rest",  
   "endpointContentType" : "json",  
   "endpointProperties" : { },  
   "gateways" : [ {  
    "gatewayId" : "TheGateway"  
   } ],  
   "publicAPI" : false,  
   "plans" : [ {  
    "planId" : "gold",  
    "version" : "1.0"  
   } ],  
   "version" : "1.0",  
   "createdBy" : "serprov",  
   "createdOn" : 1453773184845,  
   "modifiedBy" : "serprov",  
   "modifiedOn" : 1453773312563,  
   "publishedOn" : 1453773327835  
  },  
  "Policies" : [ {  
   "id" : 14,  
   "type" : "Api",  
   "organizationId" : "ACMEServices",  
   "entityId" : "echo",  
   "entityVersion" : "1.0",  
   "name" : "BASIC Authentication Policy",  
   "configuration" : "{\"realm\":\"Echo\",\"requireBasicAuth\":false,\"staticIdentity\":{\"identities\":[{\"username\":\"user1\",\"password\":\"admin123!\"}]}}",  
   "createdBy" : "serprov",  
   "createdOn" : 1453773312553,  
    "modifiedBy" : "serprov",  
    "modifiedOn" : 1453773312553,  
    "definition" : {  
    "id" : "BASICAuthenticationPolicy",  
    "templates" : [ ],  
    "deleted" : false  
   },  
   "orderIndex" : 1  
  } ]  


One thing to remember is that the exported data file represents ALL apiman data. It's not yet possible to perform incremental data backups in apiman. If you attempt to import the data from this file into the same apiman installation from which it was generated, you will see unique primary key violations as the import operation will attempt to create duplicate data elements.

OK, now that we have this exported data file, what can we do with it?

Well, obviously, if something goes wrong with your installation of apiman, you can start over with a clean installation, and instead of manually recreating your data, you can import the data. (Personal note from the author: I work in software test/QE. Part of our testing is always destructive in nature. As a result, we are always "messing up" test data. The export/import feature enables us to quickly reinstall apiman and recover a clean test environment.) To perform the import after a new installation of apiman, you simply select and upload  the exported data file:

Image title

The Management UI displays the status of the import as the data is processed:

Image title

How else can we use the exported data file?

Upgrading to a Newer Version of apiman

One of the best aspects of open source projects is the rapid rate at which new features are implemented and new versions are released. It's exciting to watch projects quickly mature as features are added and bugs are fixed, and since the projects are open source, you can even make your own contributions. This has been the case with apiman over the past several months. New features have been added such as metrics and support for creating custom policies.

One downside to all the rapid change is that as new versions of apiman have been released, we've had to recreate all our apiman data as there was no way to migrate apiman data from one release to the next. The export/import feature now gives us a way to export apiman data from one apiman release and import it into a new apiman release.

NOTE: In cases where the apiman data model changes between versions, apiman will introduce tools to transform the JSON export file from an older format to the latest.  It has not yet been decided whether those tools will be built into the Import process, or released as a standalone utility.

Migrating apiman Data from a Test Environment to a Production Environment

It's a common practice for organizations to maintain two separate installations of software releases:
  • A test environment, where the goal is to experiment with new features. This is typically an internal environment that gives up some measure of stability in exchange for the ability to "try out" new features as they become available. The rate of change for this environment is high as any disruption in service in this environment do not affect customers.
  • A production environment, where the goal is stability. This is the environment that supports your customers. Changes happen slowly in this environment and new features are only installed after they are carefully tested as disruptions in service in this environment do affect customers.
The new export/import feature in apiman 1.2 makes it possible for you to experiment with changes in your test environment, and, after the changes have been found to be stable, to easily migrate your test data from the test environment into your production environment. (You will, of course, create a backup of your production environment data before making any changes.  ;-)

Migrating apiman from one storage solution to another

Finally, when apiman is first installed, you must make various decisions about its configuration.  One of these decisions is where to store configuration and data.  When you first install apiman, you might decide that MySQL is the right choice.  However, somewhere along the line you might change your mind - perhaps you want to switch to postgresql, or even more drastically you might switch to Elasticsearch!  The Export/Import process described here solves the problem of how to migrate all your data from one storage location to another.

The process is basically the same as upgrading to a newer version of apiman.  But instead you will be upgrading to the same version of apiman, but with a different configuration.  Because the exported data is in a neutral (JSON) format, we can easily import into the new configuration.  This will result in all your data being migrated from MySQL to Elasticsearch (for example).

In Conclusion

The new export/import feature in apiman 1.2 provides an easy way to safeguard your apiman data and to make it possible to migrate your data between apiman releases and installations. In addition, since the exported data is human readable, it is a great resource for better understanding apiman data structures. And, it's easy to use too!

Cross-posted to: