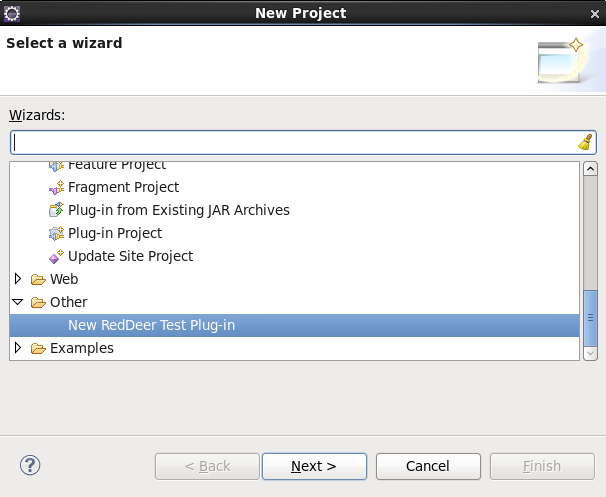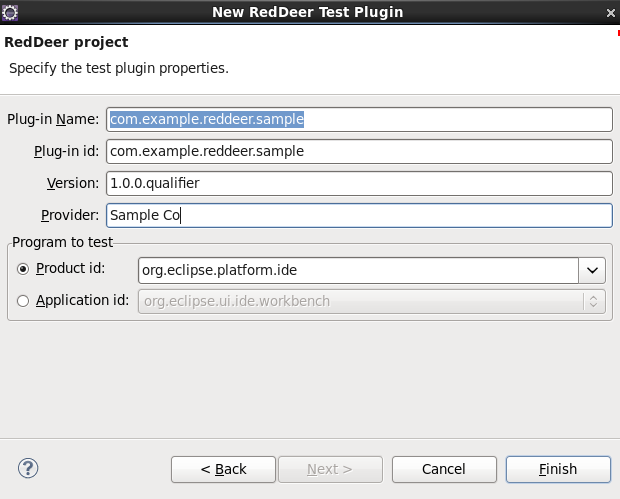
This is the second in a series of posts on the new “Red Deer” (https://github.com/jboss-reddeer/reddeer)
open source testing framework for Eclipse. In the previous post in this
series, we introduced Red Deer, learned how to install it into eclipse,
examined some of its cool features, and built and ran a sample test
program from scratch.
One
of the challenges in creating effective automated tests is in making
the tests self-sufficient enough to be able to set up their required
operation environment, and robust enough to be able to determine whether
that operating environment has been set up correctly.
In
the first post in this series, we took a quick look at Red Deer’s
implementation of Requirements classes. In this post, we’ll take a more
detailed look at Requirements, including how Red Deer supports your
creating custom Requirements.
The Case for Automated Test Requirements
Let’s
start by setting the context for why test programs need requirements.
It’s often the case that a set of automated tests runs unattended and
all the tests fail, not due to a bug in the software under test, but due
to a broken or incomplete test environment. When we refer to a Red Deer
“requirement,” we’re talking about actions that must be performed, or
objects that must be created, before a test can be run. Examples of
these requirements are having a user account defined or a connection to a
database created and verified.
What
makes using Red Deer requirements different from your creating a less
formal set of requirements with the @BeforeClass annotation provided by
JUnit, is that if requirements are not met, then the test in question is
not run. This can save you a lot of test execution time and test
failure debugging time.
Red
Deer requirements are implemented in the RedDeerSuite. A test that
makes use of requirements is must be run with a RedDeerSuite suite and
annotated with @RunWith(RedDeerSuite.class)
OOTB Red Deer Requirements
As
we saw in the first post in this series, Red Deer currently provides
OOTB (out of the box) predefined requirements that enable you to clean
out your current workspace and open a perspective.
Using these requirements is simple. All you have to do is to add these import statements to your Red Deer test programs:
import org.jboss.reddeer.eclipse.ui.perspectives.JavaBrowsingPerspective;
import org.jboss.reddeer.requirements.cleanworkspace.CleanWorkspaceRequirement.CleanWorkspace;
import org.jboss.reddeer.requirements.openperspective.OpenPerspectiveRequirement.OpenPerspective;
import org.jboss.reddeer.requirements.openperspective.OpenPerspectiveRequirement.OpenPerspective;
And,
we also have to add a reference to org.jboss.reddeer.requirements to
the required bundle list in our example’s MANIFEST.MF file. And finally,
add these annotations to the test program:
@CleanWorkspace
@OpenPerspective(JavaBrowsingPerspective.class)
@OpenPerspective(JavaBrowsingPerspective.class)
What if you want to define your own custom requirements? Let’s move on and examone how Red Deer supports that too.
Different Ways to Implement New Red Deer Requirements
Red Deer supports (4) ways to implement new requirements. We’ll look at them in order of their relative complexity:
- Simple Requirements
- Requirements with Parameters
- Requirements with Property Based Configuration
- Requirements with a Custom Schema
In
order to examine how Red Deer supports implementing new requirements,
we’ll actually create some new requirements in Red Deer source code. In
order to do this, we’ll have to download a copy of Red Deer’s source
code. To perform this download, navigate to your desired directory and
enter this command:
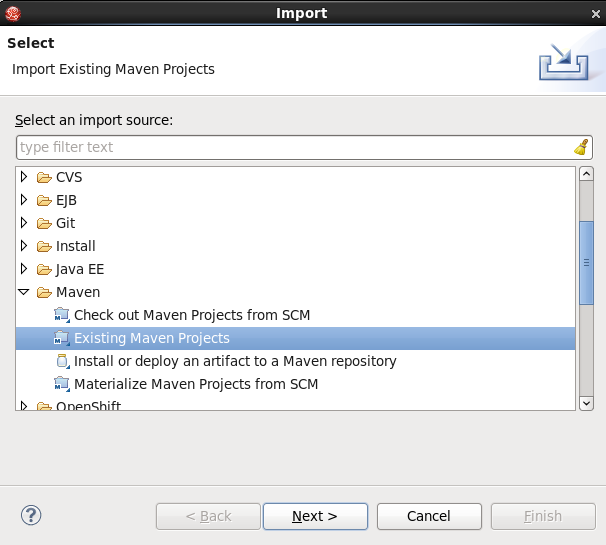
And then, import Red Deer into eclipse as a set of existing Maven projects:
If you navigate to the top level of the directory into which you downloaded the Red Deer source code, you’ll see this:
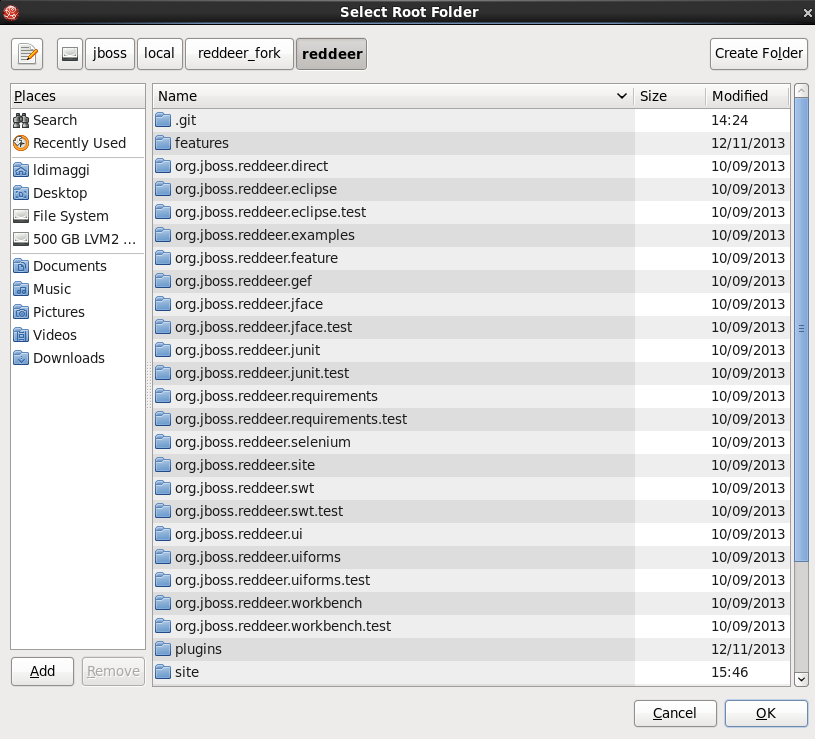
What you want to do is to select all of the Red Deer projects.
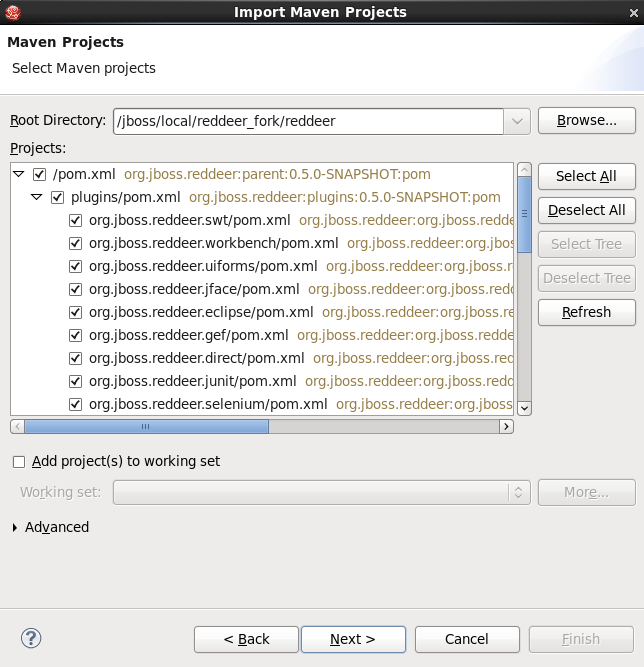
After
you press the “Next>” key, Eclipse will import all the Red Deer
packages as maven projects. (This may take a few minutes.)
OK, now we can move on to creating some new requirements. We’ll start with the simplest of the (4) types, a simple requirement.
Implementing a Simple Requirement
A
simple requirement consists of (2) parts: a “fulfilling” class that
provides the code executed when the requirement is invoked, and an
annotation that references that fulfilling class. As an illustration,
let’s look at the skeleton “AdminUserRequirement” provided with your Red
Deer download. This requirement is intended to serve as an example for
implementing a full requirement to ensure that an admin-level user is
defined before an attempt is made to run a test.
The source file you want to look for is:
/plugins/org.jboss.reddeer.examples/src/org/jboss/reddeer/junit/annotation/simple/AdminUserRequirement.java
While it’s a small file, it’s a full example. It’s worthwhile examining it line-by-line:
1:  package org.jboss.reddeer.junit.annotation.simple;
2:  import java.lang.annotation.ElementType;
3:  import java.lang.annotation.Retention;
4:  import java.lang.annotation.RetentionPolicy;
5:  import java.lang.annotation.Target;
6:  import org.jboss.reddeer.junit.requirement.Requirement;
7:  import org.jboss.reddeer.junit.annotation.simple.AdminUserRequirement.AdminUser;
8:
9:  /**
10:  * Admin user test requirement
11:  * @author lucia jelinkova
12:  *
13:  */
14:
15:  public class AdminUserRequirement implements Requirement<AdminUser> {
16:
17:    @Retention(RetentionPolicy.RUNTIME)
18:    @Target(ElementType.TYPE)
19:
20:    public @interface AdminUser {
21:    }
22:
23:    public boolean canFulfill() {
24:      // return true if you can connect to the database
25:      return true;
26:    }
27:
28:    public void fulfill() {
29:      // create an admin user in the database if it does not exist yet
30:    }
31:
32:    public void setDeclaration(AdminUser declaration) {
33:      // no need to access the annotation
34:    }
35:
36:  }
The important elements in this file are:
- Line 17 - @Retention - Specifies how the marked annotation is stored—Whether in code only, compiled into the class, or available at runtime through reflection.
- Line 18 - @Target - Marks another annotation to restrict the types of Java elements to which the the annotation can be applied
- Line 20 - AdminUser interface - This defines the object type used by the defined requirement.
- Line 23 - canFulfill method - In a fully written requirement this method will include the code to determine if the requirement can be met (or “fulfilled”). This method is set to always return a value of true.
- Line 32 - fulfill method - And here is the code that will be executed if the canFulfill method returns a value of true.
For
an example of the corresponding annotation in action, let’s look at the
test program that is included with the fulfilling class. The test
program is here:
/plugins/org.jboss.reddeer.examples/src/org/jboss/reddeer/junit/annotation/simple/AdminUserTest.java
This
test program is also very short as it is a skeleton. The outline is
there, but the specific logic that to implement the AdminUser
requirement is left as an “exercise for the reader.”
1:  package org.jboss.reddeer.junit.annotation.simple;
2:  import org.jboss.reddeer.junit.runner.RedDeerSuite;
3:  import org.jboss.reddeer.junit.annotation.simple.AdminUserRequirement.AdminUser;
4:  import org.junit.Test;
5:  import org.junit.runner.RunWith;
6:
7:  @RunWith(RedDeerSuite.class)
8:  @AdminUser
9:
10:  /**
11:  * Test with AdminUser requirement
12:  * @author lucia jelinova
13:  *
14:  */
15:
16:  public class AdminUserTest {
17:
18:    @Test
19:    public void test(){
20:     // put test logic here
21:    }
22:
23:  }
The
@AdminUser annotation on line NN tells the whole story. When this
annotation is executed, the fulfilling class is invoked and if the
“canFulfill()” method returns true, the test is executed. If the method
returns false, then the test is not executed.
Let’s run this test and see what happens.
First, locate the AdminUserTest.java file in the eclipse Navigator view: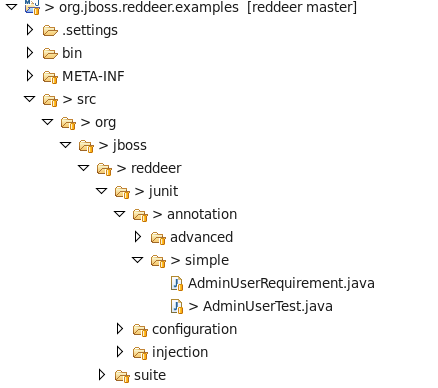
Then, right-click and specify that it be executed as a JUnit test:

And, not surprisingly, here’s the successful output from the test:

Before we move on, let’s modify the canFulFill() method to return a false value, and rerun the test. The results look like this:
22:11:04.923 INFO [main][RequirementsRunnerBuilder] Found test class org.jboss.reddeer.junit.annotation.simple.AdminUserTest
22:11:04.924
INFO [main][RequirementsBuilder] Creating requirements for test class
org.jboss.reddeer.junit.annotation.simple.AdminUserTest
22:11:04.925
DEBUG [main][RequirementsBuilder] Found requirement class
org.jboss.reddeer.junit.annotation.simple.AdminUserRequirement for
annotation interface
org.jboss.reddeer.junit.annotation.simple.AdminUserRequirement$AdminUser
22:11:04.927 INFO [main][Requirements] Requirement class org.jboss.reddeer.junit.annotation.simple.AdminUserRequirement can be fulfilled: false
22:11:04.927 INFO [main][RequirementsRunnerBuilder] All requirements cannot be fulfilled, the test will NOT run
So,
this time, the requirement was not met and the test was not run. Note
that the requirement did the work for us. We did not have to write a lot
of new code to determine if the requirement had been met to decide
whether or not to run the test.
That’s
all well and good for a simple requirement. But what about if we want
to make the requirement a bit more flexible by enabling us to pass it a
parameter? Let’s look at that next.
Implementing a Requirement with Parameters
In
order to implement a requirement that accepts one or more parameters,
we have to make two additions to the simple requirement that we just
examined.
First, we have to use a different requirement definition. The code that we want to look at this time is here:
/plugins/org.jboss.reddeer.examples/src/org/jboss/reddeer/junit/annotation/advanced/UserRequirement.java
The file looks like this:
1:  package org.jboss.reddeer.junit.annotation.advanced;
2:  import java.lang.annotation.ElementType;
3:  import java.lang.annotation.Retention;
4:  import java.lang.annotation.RetentionPolicy;
5:  import java.lang.annotation.Target;
6:  import org.jboss.reddeer.junit.requirement.Requirement;
7:  import org.jboss.reddeer.junit.annotation.advanced.UserRequirement.User;
8:
9:  /**
10:  * Parameterized requirement with parameter name
11:  * @author vpakan
12:  *
13:  */
14:
15:  public class UserRequirement implements Requirement<User> {
16:
17:    @Retention(RetentionPolicy.RUNTIME)
18:    @Target(ElementType.TYPE)
19:
20:    public @interface User {
21:      String name();
22:    }
23:
24:    private User user;
25:    public boolean canFulfill() {
26:      // return true if you can connect to the database
27:      return true;
28:    }
29:
30:    public void fulfill() {
31:      System.out.println("Fulfilling reuirement User with name: " + user.name());
32:      // create an admin user in the database if it does not exist yet
33:    }
34:
35:    public void setDeclaration(User user) {
36:      this.user = user;
37:    }
38:
39:  }
The important difference between this class and the original AdminUserRequirement that we examined a moment ago is:
- Line 20 - The interface “User” now defines a String parameter “name” and on line NNN here the User object is defined.
Second,
we have to change the declaration of the requirement in the test
program. The test program that we’ll look at this time is here:
/plugins/org.jboss.reddeer.examples/src/org/jboss/reddeer/junit/annotation/advanced/UserTest.java
Finally, our test program for this requirement looks like this:
1:  package org.jboss.reddeer.junit.annotation.advanced;
2:  import org.jboss.reddeer.junit.runner.RedDeerSuite;
3:  import org.jboss.reddeer.junit.annotation.advanced.UserRequirement.User;
4:  import org.junit.Test;
5:  import org.junit.runner.RunWith;
6:
7:  @RunWith(RedDeerSuite.class)
8:  @User(name="admin")
9:
10:  /**
11:  * Test with parameterized requirement User
12:  * @author lucia jelinkova
13:  *
14:  */
15:
16:  public class UserTest {
17:
18:    @Test
19:    public void test(){
20:      // put test logic here
21:    }
22:
23:  }
The interesting line in this test is:
- Line 8 - @User(name="admin") - Where we set the value of the “name” parameter.
When we run the UserTest as a JUnit test, we see this output:
20:46:03.554 INFO [main][RequirementsRunnerBuilder] Found test class org.jboss.reddeer.junit.annotation.advanced.UserTest
20:46:03.555
INFO [main][RequirementsBuilder] Creating requirements for test class
org.jboss.reddeer.junit.annotation.advanced.UserTest
20:46:03.556
DEBUG [main][RequirementsBuilder] Found requirement class
org.jboss.reddeer.junit.annotation.advanced.UserRequirement for
annotation interface
org.jboss.reddeer.junit.annotation.advanced.UserRequirement$User
20:46:03.558
INFO [main][Requirements] Requirement class
org.jboss.reddeer.junit.annotation.advanced.UserRequirement can be
fulfilled: true
20:46:03.558 INFO [main][RequirementsRunnerBuilder] All requirements can be fulfilled, the test will run
20:46:03.575 INFO [main][RedDeerSuite] RedDeer suite created
20:46:03.584
INFO [main][Requirements] Fulfilling requirement of class
org.jboss.reddeer.junit.annotation.advanced.UserRequirement
Fulfilling requirement User with name: admin
20:46:03.585 DEBUG [main][RequirementsRunner] Injecting fulfilled requirements into test instance
20:46:03.587
INFO [main][RequirementsRunner] Started test:
test(org.jboss.reddeer.junit.annotation.advanced.UserTest)20:46:03.588
INFO [main][RequirementsRunner] Finished test:
test(org.jboss.reddeer.junit.annotation.advanced.UserTest)
While
it makes requirements more flexible when you are able to add parameters
to their definition, it is still limited as a solution as you have to
handle the individual parameters one by one. Fortunately, Red Deer also
supports defining test configurations in your own custom XML schemas.
Defining Complex Configurations - Two Approaches
Red Deer supports two different approaches to defining complex configurations. You can either:
- Define the configuration as a set of (key=value) properties. If you choose this approach, you will have to also define setter methods for each property in your requirement’s fulfilling class.
- Create a custom XML schema. If you choose this approach, you will have to create a configuration object in your test code and then inject that object into your requirement.
Regardless
of which approach you choose, you store the configuration data in
either a single XML file, or directory of XML files and then pass those
files to your test program by defining this JVM argument when you run
your test programs:
-Dreddeer.config=/home/path/to/file/or/directory
Let’s examine each of these approaches in detail. We’ll start with the properties based approach.
Requirements with a Property Based Configuration
The
first thing we have to do to use a property based configuration is to
define the properties. We’ll do this in an an XML file that complies
with the Red Deer requirements XSD schema file.
You can view the XSD here: http://cloud.github.com/downloads/jboss-reddeer/reddeer/RedDeerSchema.xsd
The code for this example is here:
/jboss/local/reddeer_fork/reddeer/plugins/org.jboss.reddeer.examples/src/org/jboss/reddeer/junit/configuration/simple
And
- here’s our properties file. Note that the requirement defined in this
file contains two properties: name and ip (IP address).
Let’s now expand on the “UserRequirement” example that we defined a few minutes ago. What we want to be able to do is to remove hardcoded requirements data from the source code and instead define that data in set of properties.
1:  <?xml version="1.0" encoding="UTF-8"?>
2:  <testrun
3:    xmlns="http://www.jboss.org/NS/Req"
4:    xmlns:xsi="http://www.w3.org/2001/XMLSchema-instance"
5:    xmlns:server="http://www.jboss.org/NS/ServerReq"
6:    xsi:schemaLocation="http://www.jboss.org/NS/Req http://cloud.github.com/downloads/jboss-reddeer/reddeer/RedDeerSchema.xsd http://www.jboss.org/NS/ServerReq ServerRequirements.xsd">
7:
8:    <requirements>
9:      <requirement class="org.jboss.reddeer.junit.annotation.simple.UserRequirement" name="userRequirement">
10:        <property key="name" value="USERS_ADMINISTRATION" />
11:        <property key="ip" value="127.0.0.1" />
12:      </requirement>
13:    </requirements>
14:  </testrun>
Let’s now expand on the “UserRequirement” example that we defined a few minutes ago. What we want to be able to do is to remove hardcoded requirements data from the source code and instead define that data in set of properties.
To use this requirements.xml file, we have to make some changes to the UserRequirement.java class.
1:  package org.jboss.reddeer.junit.annotation.simple;
2:  import java.lang.annotation.ElementType;
3:  import java.lang.annotation.Retention;
4:  import java.lang.annotation.RetentionPolicy;
5:  import java.lang.annotation.Target;
6:  import org.jboss.reddeer.junit.requirement.Requirement;
7:  import org.jboss.reddeer.junit.annotation.simple.UserRequirement.User;
8:  import org.jboss.reddeer.junit.requirement.PropertyConfiguration;
9:
10:  /**
11:  * Admin user test requirement
12:  * @author lucia jelinkova
13:  */
14:
15:  public class UserRequirement implements Requirement<User> , PropertyConfiguration
16:  {
17:    @Retention(RetentionPolicy.RUNTIME)
18:    @Target(ElementType.TYPE)
19:    public @interface User {
20:    }
21:    private String name;
22:    private String ip;
23:
24:    public boolean canFulfill() {
25:      // return true if you can connect to the database
26:      return true;
27:    }
28:
29:    public void fulfill() {
30:      System.out.println("Fulfilling User requirement with\nName: " + name
31:          + "\nIP: " + ip);
32:      // create an admin user in the database if it does not exist yet
33:    }
34:
35:    @Override
36:    public void setDeclaration(User user) {
37:      // annotation has no parameters no need to store reference to it
38:    }
39:
40:    public void setName(String name) {
41:      this.name = name;
42:    }
43:
44:    public void setIp(String ip) {
45:      this.ip = ip;
46:    }
47:
48:    public String getName() {
49:      return name;
50:    }
51:
52:    public String getIp() {
53:      return ip;
54:    }
55:
56:  }
The important changes are the addition of this import statement at line 8:
import org.jboss.reddeer.junit.requirement.PropertyConfiguration
And
the addition of the implement clauses for the Requirement (with a type
of User), and the PropertyConfiguration (so that the properties can be
read) at line 15:
public class UserRequirement implements Requirement , PropertyConfiguration
And addition of the setter methods for the name and ip properties.
Finally, here is the updated test program:
1:  package org.jboss.reddeer.junit.annotation.simple;
2:  import org.jboss.reddeer.junit.runner.RedDeerSuite;
3:  import org.jboss.reddeer.junit.annotation.simple.UserRequirement.User;
4:  import org.junit.Test;
5:  import org.junit.runner.RunWith;
6:  import org.jboss.reddeer.junit.requirement.inject.InjectRequirement;
7:
8:  @RunWith(RedDeerSuite.class)
9:  @User
10:  /**
11:  * Test with AdminUser requirement
12:  * @author lucia jelinova
13:  *
14:  */
15:
16:  public class UserTest {
17:
18:    @InjectRequirement
19:    private UserRequirement userRequirement;
20:
21:    @Test
22:    public void test(){
23:      System.out.println("The test is running");
24:      System.out.println(userRequirement.getName());
25:     // put test logic here
26:    }
27:
28:  }
What’s new in the test program is the addition of the import statement for the requirement injection:
import org.jboss.reddeer.junit.requirement.inject.InjectRequirement;
And the code to define and inject the UserRequirement:
@InjectRequirement
private UserRequirement userRequirement;
When
we run the test, we have to reference the configuration file via a Java
VM argument . This means that we must define a new “run configuration”
that is based on the JUnit run configuration provided in Eclipse and
provide the VM argument that references the configuration file:
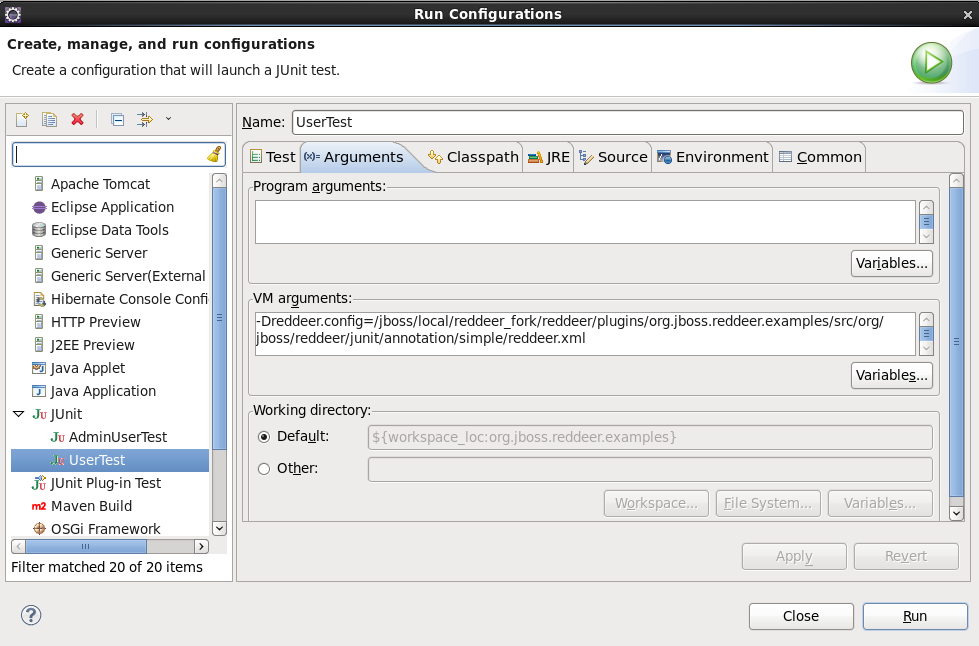
In our example, the -Dreddeer.config VM argument is defined as:
-Dreddeer.config=/jboss/local/reddeer_fork/reddeer/plugins/org.jboss.reddeer.examples/src/org/jboss/reddeer/junit/annotation/simple/reddeer.xml
To execute the test, right-click on the UserTest class, and select the run configuration we just created:

And, the test generates this test output in the console:
22:40:50.988 INFO [main][RedDeerSuite] Creating RedDeer suite...
22:40:50.990
INFO [main][SuiteConfiguration] Looking up configuration files defined
via property
reddeer.config=/jboss/local/reddeer_fork/reddeer/plugins/org.jboss.reddeer.examples/src/org/jboss/reddeer/junit/annotation/simple/reddeer.xml
22:40:50.991
INFO [main][SuiteConfiguration] Found configuration file
/jboss/local/reddeer_fork/reddeer/plugins/org.jboss.reddeer.examples/src/org/jboss/reddeer/junit/annotation/simple/reddeer.xml
22:40:50.992 INFO [main][RedDeerSuite] Adding suite with name reddeer.xml to RedDeer suite
22:40:51.012 INFO [main][RequirementsRunnerBuilder] Found test class org.jboss.reddeer.junit.annotation.simple.UserTest
22:40:51.025
INFO [main][RequirementsBuilder] Creating requirements for test class
org.jboss.reddeer.junit.annotation.simple.UserTest
22:40:51.027
DEBUG [main][RequirementsBuilder] Found requirement class
org.jboss.reddeer.junit.annotation.simple.UserRequirement for annotation
interface
org.jboss.reddeer.junit.annotation.simple.UserRequirement$User
22:40:51.027
DEBUG [main][PropertyBasedConfigurator] Setting property based
configuration to requirement class
org.jboss.reddeer.junit.annotation.simple.UserRequirement
22:40:51.031
DEBUG [main][XMLReader] Reading configuration for class
org.jboss.reddeer.junit.internal.configuration.entity.PropertyBasedConfiguration
22:40:51.827 DEBUG [main][PropertyBasedConfigurator] Configuration successfully set
22:40:51.828
INFO [main][Requirements] Requirement class
org.jboss.reddeer.junit.annotation.simple.UserRequirement can be
fulfilled: true
22:40:51.828 INFO [main][RequirementsRunnerBuilder] All requirements can be fulfilled, the test will run
22:40:51.865 INFO [main][RedDeerSuite] RedDeer suite created
22:40:51.874 INFO [main][Requirements] Fulfilling requirement of class org.jboss.reddeer.junit.annotation.simple.UserRequirement
Fulfilling User requirement with
Name: USERS_ADMINISTRATION
IP: 127.0.0.1
22:40:51.875 DEBUG [main][RequirementsRunner] Injecting fulfilled requirements into test instance
22:40:51.876 INFO [main][RequirementsRunner] Started test: test reddeer.xml(org.jboss.reddeer.junit.annotation.simple.UserTest)
22:40:51.876 INFO [main][RequirementsRunner] Started test: test reddeer.xml(org.jboss.reddeer.junit.annotation.simple.UserTest)
The test is running
USERS_ADMINISTRATION
22:40:51.878 INFO [main][RequirementsRunner] Finished test: test reddeer.xml(org.jboss.reddeer.junit.annotation.simple.UserTest)
22:40:51.878 INFO [main][RequirementsRunner] Finished test: test reddeer.xml(org.jboss.reddeer.junit.annotation.simple.UserTest)
Requirements with a Custom Schema
The
fourth and final approach to defining new requirements is to create a
custom XML schema. This is the most complex approach, but it also
provides you with the most flexibility as you can more easily share
requirements in multiple configuration files. Also, this approach can
protect you against forgetting to define properties in the configuration
files by designating specific properties as required XML elements.
To
use this approach, you create a custom XML schema, then you create a
configuration object in the test programs, and inject that object into
your requirement. The configuration details are defined in an XML file
and accessed through JAXB annotations.
Let’s take a look at an example. The code for this example is available in Red Deer here:
/plugins/org.jboss.reddeer.examples/src/org/jboss/reddeer/junit/configuration/advanced
In order to use a custom XML schema, you need a custom schema. In this example, the schema is defined in a local file:
/plugins/org.jboss.reddeer.examples/src/org/jboss/reddeer/junit/configuration/advanced/RedDeerRequirements.xsd
This
example schema is fairly simple, but it provides the flexibility needed
for the example to define a test configuration of key=value pairs in
the context of testruns and requirements. Also, the schema enforces the
“required” setting for the requirement name.
The
configuration for requirement is defined in an XML requirement
configuration file, the format of which complies with the custom schema:
1:  <?xml version="1.0" encoding="UTF-8"?>
2:  <testrun
3:    xmlns="http://www.jboss.org/NS/Req"
4:    xmlns:xsi="http://www.w3.org/2001/XMLSchema-instance"
5:    xmlns:user="http://www.jboss.org/NS/user-schema"
6:    xsi:schemaLocation="http://www.jboss.org/NS/Req RedDeerRequirements.xsd http://www.jboss.org/NS/user-schema user-schema.xsd">
7:    <requirements>
8:      <user:user-requirement name="user-requirement">
9:        <user:db-name>USERS_ADMINISTRATION</user:db-name>
10:        <user:ip>127.0.0.1</user:ip>
11:        <user:port>1111</user:port>
12:      </user:user-requirement>
13:    </requirements>
14:  </testrun>
In
order to make use of this configuration, the Requirement class must
instantiate a “UserConfiguration” object for the requirement. The
UserRequirement class implements the
org.jboss.reddeer.junit.requirement.CustomConfiguration interface with
and specifies a type of UserConfiguration to enable the use of custom
configurations:
1:  package org.jboss.reddeer.junit.configuration.advanced;
2:  import java.lang.annotation.ElementType;
3:  import java.lang.annotation.Retention;
4:  import java.lang.annotation.RetentionPolicy;
5:  import java.lang.annotation.Target;
6:  import org.jboss.reddeer.junit.requirement.CustomConfiguration;
7:  import org.jboss.reddeer.junit.requirement.Requirement;
8:  import org.jboss.reddeer.junit.configuration.advanced.UserRequirement.User;
9:
10:  /**
11:  * User requirement using configuration from custom xml file
12:  * @author lucia jelinkova
13:  *
14:  */
15:
16:  public class UserRequirement implements Requirement<User>, CustomConfiguration<UserConfiguration> {
17:    @Retention(RetentionPolicy.RUNTIME)
18:    @Target(ElementType.TYPE)
19:
20:    public @interface User {
21:      String name();
22:    }
23:
24:    private User user;
25:    private UserConfiguration userConfiguration;
26:
27:    public boolean canFulfill() {
28:      // return true if you can connect to the database
29:      return true;
30:    }
31:
32:    public void fulfill() {
33:      System.out.println("fulfiling requirement User with\nName: " + user.name() +
34:        "\nDB name: " +  userConfiguration.getDbName() +
35:        "\nPort: " + userConfiguration.getPort() +
36:        "\nIP: " + userConfiguration.getIp());
37:      // create an admin user in the database if it does not exist yet
38:    }
39:
40:    public void setDeclaration(User user) {
41:      this.user = user;
42:    }
43:
44:    public Class<UserConfiguration> getConfigurationClass() {
45:      return UserConfiguration.class;
46:    }
47:
48:    public void setConfiguration(UserConfiguration config) {
49:      this.userConfiguration = config;
50:    }
51:
52:  }
The
UserConfiguration object (see line 25) is used by the
org.jboss.reddeer.junit.requirement.CustomConfiguration class to provide
the values for the requirement. The UserConfiguration definition (see
below) maps the requirement as defined in the elements defined in the
requirement XML file.
1:  package org.jboss.reddeer.junit.configuration.advanced;
2:  import javax.xml.bind.annotation.XmlElement;
3:  import javax.xml.bind.annotation.XmlRootElement;
4:
5:  /**
6:  * Stores user requirement configuration loaded from custom xml file
7:  * @author lucia jelinkova
8:  *
9:  */
10:
11:  @XmlRootElement(name="user-requirement", namespace="http://www.jboss.org/NS/user-schema")
12:  public class UserConfiguration {
13:    private String dbName;
14:    private String ip;
15:    private String port;
16:
17:    public String getIp() {
18:      return ip;
19:    }
20:
21:    @XmlElement(namespace="http://www.jboss.org/NS/user-schema")
22:    public void setIp(String ip) {
23:      this.ip = ip;
24:    }
25:
26:    public String getPort() {
27:      return port;
28:    }
29:
30:    @XmlElement(namespace="http://www.jboss.org/NS/user-schema")
31:    public void setPort(String port) {
32:      this.port = port;
33:    }
34:
35:    public String getDbName() {
36:      return dbName;
37:    }
38:
39:    @XmlElement(name="db-name", namespace="http://www.jboss.org/NS/user-schema")
40:    public void setDbName(String dbName) {
41:      this.dbName = dbName;
42:    }
43:
44:  }
Note
the getter and setter methods in the class definition. These methods
make use of JAXB annotations to access the configuration element values.
The
test program looks largely the same as the test programs that we’ve
used in the earlier examples. (It’s a nice characteristic of Red Deer
tests in that since the “heavy lifting” is performed by the Red Deer
harness, the tests can be kept simple, and therefore kept easy to
maintain.)
1:  package org.jboss.reddeer.junit.configuration.advanced;
2:  import org.jboss.reddeer.junit.runner.RedDeerSuite;
3:  import org.jboss.reddeer.junit.configuration.advanced.UserRequirement.User;
4:  import org.junit.Test;
5:  import org.junit.runner.RunWith;
6:
7:  /**
8:  * User test using configuration from custom xml file
9:  * Set VM parameter -Dreddeer.config to point to directory with requirements.xml file
10:  * -Dreddeer.config=${project_loc}/src/org/jboss/reddeer/junit/configuration/advanced
11:  * @author lucia jelinkova
12:  */
13:
14:  @RunWith(RedDeerSuite.class)
15:  @User(name="admin")
16:  public class UserTest {
17:    @Test
18:
19:    public void test(){
20:      // put your test logic here
21:    }
22:  }
23:
When the program is run, the console shows that the requirement was successfully met:
21:26:25.075 INFO [main][RedDeerSuite] Creating RedDeer suite...
21:26:25.077
INFO [main][SuiteConfiguration] Looking up configuration files defined
via property
reddeer.config=/jboss/local/reddeer_fork/reddeer/plugins/org.jboss.reddeer.examples/src/org/jboss/reddeer/junit/configuration/advanced/requirements.xml
21:26:25.077
INFO [main][SuiteConfiguration] Found configuration file
/jboss/local/reddeer_fork/reddeer/plugins/org.jboss.reddeer.examples/src/org/jboss/reddeer/junit/configuration/advanced/requirements.xml
21:26:25.078 INFO [main][RedDeerSuite] Adding suite with name requirements.xml to RedDeer suite
21:26:25.084 INFO [main][RequirementsRunnerBuilder] Found test class org.jboss.reddeer.junit.configuration.advanced.UserTest
21:26:25.087
INFO [main][RequirementsBuilder] Creating requirements for test class
org.jboss.reddeer.junit.configuration.advanced.UserTest
21:26:25.089
DEBUG [main][RequirementsBuilder] Found requirement class
org.jboss.reddeer.junit.configuration.advanced.UserRequirement for
annotation interface
org.jboss.reddeer.junit.configuration.advanced.UserRequirement$User
21:26:25.089
DEBUG [main][CustomConfigurator] Setting custom configuration to
requirement class
org.jboss.reddeer.junit.configuration.advanced.UserRequirement
21:26:25.090
DEBUG [main][CustomConfigurator] Configuration object associated with
requirement class
org.jboss.reddeer.junit.configuration.advanced.UserRequirement is class
org.jboss.reddeer.junit.configuration.advanced.UserConfiguration
21:26:25.090
DEBUG [main][XMLReader] Reading configuration for class
org.jboss.reddeer.junit.configuration.advanced.UserConfiguration
21:26:25.782 DEBUG [main][CustomConfigurator] Configuration successfully set
21:26:25.832
INFO [main][Requirements] Requirement class
org.jboss.reddeer.junit.configuration.advanced.UserRequirement can be
fulfilled: true
21:26:25.832 INFO [main][RequirementsRunnerBuilder] All requirements can be fulfilled, the test will run
21:26:25.911 INFO [main][RedDeerSuite] RedDeer suite created
21:26:25.921
INFO [main][Requirements] Fulfilling requirement of class
org.jboss.reddeer.junit.configuration.advanced.UserRequirement
fulfiling requirement User with
Name: admin
DB name: USERS_ADMINISTRATION
Port: 1111
IP: 127.0.0.1
21:26:25.922 DEBUG [main][RequirementsRunner] Injecting fulfilled requirements into test instance
21:26:25.923
INFO [main][RequirementsRunner] Started test: test
requirements.xml(org.jboss.reddeer.junit.configuration.advanced.UserTest)
21:26:25.924
INFO [main][RequirementsRunner] Started test: test
requirements.xml(org.jboss.reddeer.junit.configuration.advanced.UserTest)
21:26:25.925
INFO [main][RequirementsRunner] Finished test: test
requirements.xml(org.jboss.reddeer.junit.configuration.advanced.UserTest)
21:26:25.925
INFO [main][RequirementsRunner] Finished test: test
requirements.xml(org.jboss.reddeer.junit.configuration.advanced.UserTest)
Before
we move on, let’s try introducing an error in the XML test
configuration and then see how Red Deer can trap that error. I don’t
know about you, but avoiding typos is sometimes difficult for me. Let’s
“inadvertently” remove the (required) name for the requirement. And
rerun the test. This time, the console output shows:
ERROR [main][XMLReader] cvc-complex-type.4: Attribute 'name' must appear on element 'user:user-requirement'.
And the Junit output shows:
org.jboss.reddeer.junit.configuration.RedDeerConfigurationException: Xml configuration is not valid.
Recap
In
this post, we examined the 4 ways in which Red Deer supports creating
your own custom test configurations. These methods range from simple
requirements that optionally include parameters, to more complex
requirements that can be defined in external XML files, either as
key=value pairs or in a custom schema, that can be be shared between
multiple test cases.
It’s
often the case that automated test runs can fail not because of bugs in
software under test, but because the environment required by the test
was properly initialized. Red Deer, by providing multiple approaches to
create custom requirements helps you to ensure that your test failures
can be more easily debugged and configuration errors are detected.
What’s Next?
In
the next post in this series, we’ll take a look at how Red Deer makes
creating new tests from scratch easier through its keystroke recorder
feature.
References